It turns out that Mercury Filmworks just released an Hilda themed sticker pack for iMessage
The problem: I don’t have any Apple devices and I really want to use them.
The solution? FFMPEG + MagicWand
To see the full result:
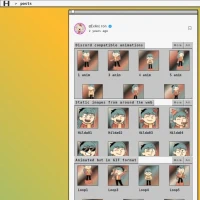
An incomplete collection of animated stickers copied from the official iOS sticker pack
The first step is to download the video, crop it at rougly the size of the character and split it into individual frames, then separate each animation by grouping the frames in separate folders. At this point I suggest you to rename the files starting from either 0 or 1 (with padding) to ease the next steps.
But how to cropt it efficently without risking cropping too much or too little?
Well, it turns out that the person who made the video left a slight gray background for the animation's layer so we can just use the Highlights/Shadows effect in paint.net (or something similar in your favorite image editor software) and measure its coordinates.
num=0
for file in *.bmp;
do mv $file $(printf '%02d' $num).bmp
let "num++"
done
I exported the original frames in bmp format for ease of separation. An example of files that we may end up with is this
First problem: white-ish background
n.b. to ease the spot of transparencies and artifacts I’ve put a dark green background for the images
Now it’s time to use some new toys: the magicwand script.
for file in *.bmp;
do ./magicwand 3,3 -t 20 \
 -f image \
 -r outside \
 -m overlay \
 -o 0 $file first-$file;
done
It basically takes a pixel at x,y=3 and with a threshold of 20 creates deletes that region and replaces it with a transparent blob.

Now to remove the enclosed spot we just do the same with a different coordinate
for file in *.bmp;
do ./magicwand 454,732  -t 20 \
 -f image \
 -r outside \
 -m overlay \
 -o 0 $file second-$file;
done

Second problem: raw edges and size
For this part we can do this with one single command.
num=0
mkdir outline-resize2
for file in *.bmp;
    do convert $file  \
        \( +clone \
        -alpha extract \
        -morphology edge octagon \
        -threshold 50% \
        -fill white \
        -opaque white \
        -transparent black \)  \
        -composite \
        -resize 310x310\>   \
        -background none  \
        -gravity center  \
        -extent 320x320 \
        outline-resize2/$(printf '%02d' $num).png
let "num++"
done
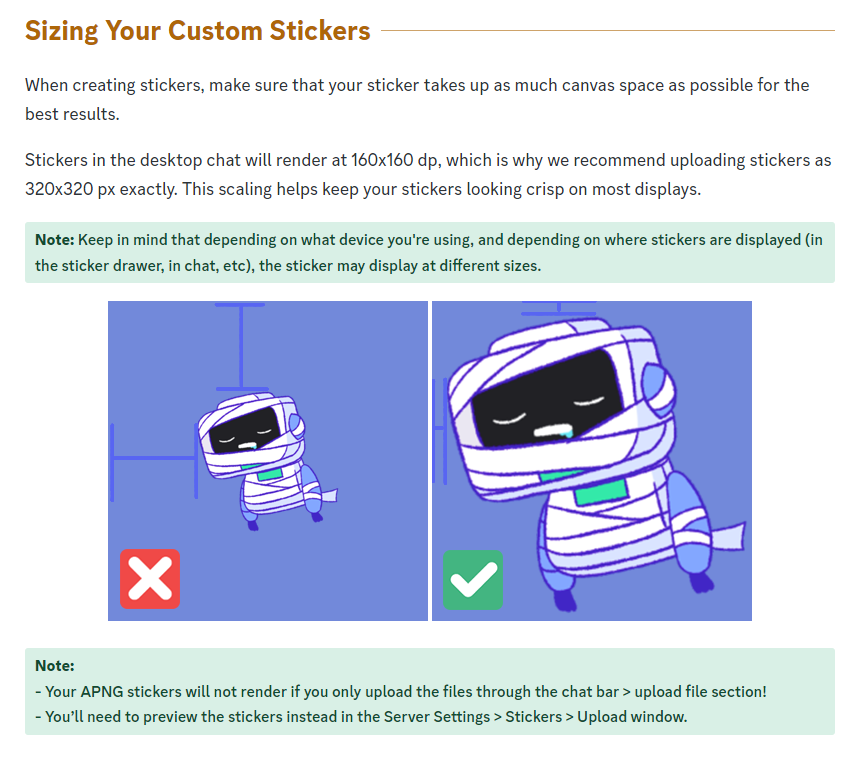
What does it do? Well, it finds the non-transparent region and puts a white outline around it.1 Then it resizes the image to fit inside a 310x310 square to leave some padding and at the end it finally outputs a 320x320 png file.

At this point we are done, we have the frames of the right size and we can create all the GIFs we want. Unfortunately it’s not so easy.
Third problem: file size
Our gif is too big to fit inside Discord’s file weight limits even after compressing and reducing the size even more. To solve this i ended up using the aPNG format.
The first step is to install pngquant and apngasm
Then we are going to create one big column of frames
convert ??.png -append stacked.png

Now it’s time to compress every pixel out of it
pngquant \
--quality 2-22 \
--speed 1 \
--posterize 1 \
--strip -- stacked.png
Thanks to this trick we reduced the file size of almost 80%

Now it’s time to animate it
apngasm \
anim.png \
stacked-compressed.png \
-vs48 \
1 24
anim.png will be our final file, vs48 refers to the 48 frames stacked vertically of the input image and 1 24 is the framerate
Now if your broswer supported aPNGs you will be able to see it:

If you wanted to outline, crop, compress and animate all in one command then you can do:
num=0
mkdir outline-resize2
for file in *.bmp;
    do convert $file  \
        \( +clone \
        -alpha extract \
        -morphology edge octagon \
        -threshold 50% \
        -fill white \
        -opaque white \
        -transparent black \)  \
        -composite \
        -resize 310x310\>   \
        -background none  \
        -gravity center  \
        -extent 320x320 \
        outline-resize2/$(printf '%02d' $num).png
let "num++"
done

cd outline-resize2

convert ??.png -append stacked.png

pngquant \
--quality 2-22 \
--speed 1 \
--posterize 1 \
--output stacked-compressed.png \
--strip -- stacked.png

apngasm \
anim.png \
stacked-compressed.png \
-vs$(printf '%02d' $num) \
1 24
September 2024 update
With the APK is finally possible to avoid the whole cleanup process, just put the GIFs in a folder and run:
for file in *.gif; do
    folder="${file%.gif}"
    mkdir $folder
    ffmpeg -i $file  $folder/%2d.bmp
done

gifd=$(pwd)
for dir in */ ; do
    echo "$dir"
    name="${dir%/}"
    cd $gifd/$dir

    frames="$(ls -1 | wc -l)"

    convert ??.bmp -append stacked.png
    pngquant \
        --quality 2-22 \
        --speed 1 \
        --posterize 1 \
        --output stacked-compressed.png \
        --strip -- stacked.png
    apngasm \
        $name.png \
        stacked-compressed.png \
        -vs$(printf '%02d' $frames) \
        1 24

    cd $gifd
done